Maybe the most frequently asked question we've got this month: "does seat x fit on a Treq rig, and how do I install it?" So, time for some explanation!
This blog will explain how seats are installed, and is meant for those already having or eying a seat. If you're still in the process of choosing a seat, than this blog is worth a read.
We divide seats into two categories: bottom-mounted and side-mounted. Virtually all seats are attached to a sim rig using one of these two methods.
1. SIDE MOUNTED SEATS
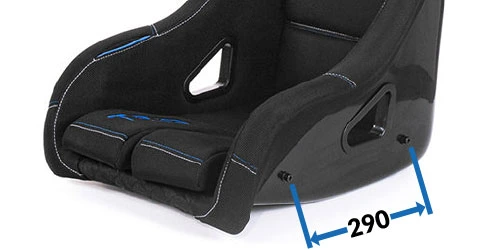
This is the easy one and is most commonly used with bucket seats. It means the seat has 4 mounting holes, 2 on each side, visible on the side of the seat. You install these seats with Seat Brackets. Most seats use the industry-standard 290 mm distance between the mounting points, meaning most bucket seats fit most seat brackets, which allows you to mix and match different brands.
You adjust the angle of the seat / backrest using the seat brackets. The brackets go on top of the two 4040 profiles that are underneath the seat. The only thing to check here is if your seat has that 290 mm and if the brackets come with mounting materials (ours do).
2. BOTTOM MOUNTED SEATS
Bottom mounted seats have their mounting holes positioned underneath the seating area. This is common for office chairs, recliner seats or OEM car seats. They do not share an industry standard regarding mounting holes, but luckily most of these seats can easily be mounted on an aluminum sim rig.
2a. BOTTOM MOUNT WITH SEAT SLIDER
A lot of cheaper sim rig seats or junk yard seats come with a seat slider already installed. When this is the case, the slider goes directly on top of the two 4040 profiles of the sim rig, and you are quickly done with the installment. Important to notice: installing it like this, does not give any adjustability in the angle of the seat. Recliner seats can have the angle of the backrest changed, but the seating area will be fixed. If you do want to adjust this angle, install the seat with inverted Seat Brackets (more on that later).
Can any seat with a slider be installed?
Check if the bottom of the slider is flush. Sometimes OEM seats have crazy shapes in their sliders, or a different height between the left and the right one. But they end up on two profiles that are on the same plane.
Do I need mounting material?
Check if your seat has mounting material included. If not, you will need 4 pieces of M8 T-nuts and 4 pieces of M8x12 screws.
2b. BOTTOM MOUNT WITHOUT SEAT SLIDER.
If you want to mount an office chair or a recliner seat without a slider, make sure the bottom of the seat is flush. Then, install the corner brackets on the side of the two 4040 profiles. This creates 4 new holes that can secure a seat from the bottom:
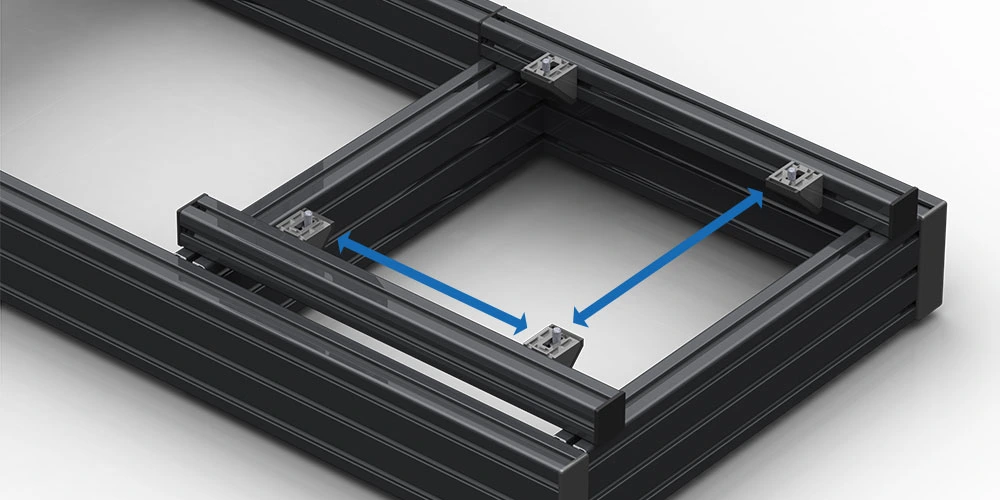
The two blue lines are variable sizes. You can slide the 4040 profiles and the brackets on those profiles to create any square mounting pattern you desire.
Do I need mounting material?
We deliver some spare corner brackets with each rig, but these might be used for installing the pedals. To be sure you can install a seat this way, you will need 4 pieces of Corner Brackets.
2c. BOTTOM MOUNT WITH INVERTED SEAT BRACKETS
Method 2a and 2b do not give you the option to tilt the seat. But if you want the angle of your seat adjusted, you can do so by installing the Seat Brackets upside down. This looks a bit funky, but it works:
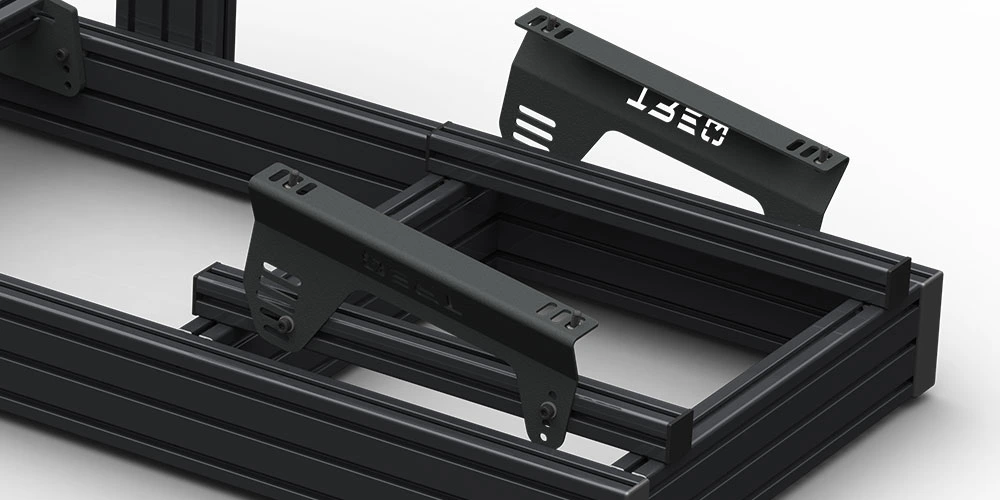
For this option, you will need the Seat Brackets.